How I made an Accessibility DIY Kit for Windows.
Setup
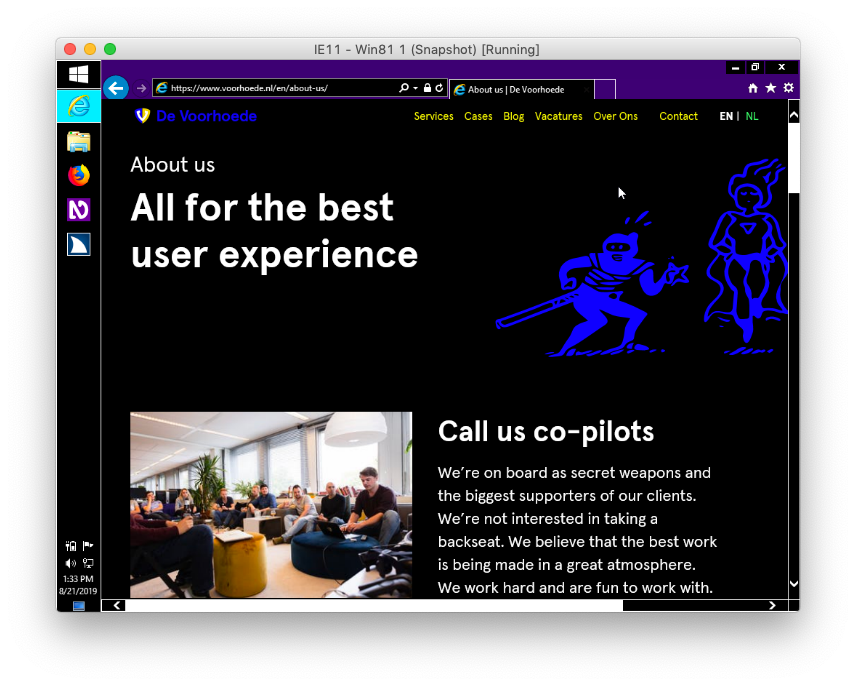
The setup you need makes use of the virtual machines that Microsoft makes available for browser testing. As these contain full versions of Windows, you can install any compatible software on them, as well as configure the OS to your liking. I installed two screen readers on this virtual machine, and turned on High Contrast mode. This is a simple ‘productivity hack’ to be able to get more reliable results from my accessibility tests.
This is what it looks like:
How to build your own Accessibility DIY Kit
Download a virtual machine from Microsoft. I recommend IE on Win81, as not everybody uses the most up-to-date version of accessibility software and operating systems. Install the virtual machine in your virtualisation software of choice. I use VirtualBox.
Screen readers
After starting up the virtual machine, we are going to install some software.
- First, download and install NVDA, a free open source screen reader. In the installation prompt, click the button ‘Install NVDA on this computer’. In the next prompt, deselect ‘Use NVDA on the Windows logon screen’.
- Next, download and install JAWS. JAWS is commercial software, but offers a 40-minute trial mode in which you can use the full application. After installation, check ‘Do not show this dialog again’ and press the button ‘Continue to Run in 40 Minute Mode’.
- Finally, download and install Firefox. Most screen readers work best with a specific browser. JAWS works best with Internet Explorer, and NVDA works best with Firefox.
Keyboard configuration
JAWS uses the INS (Insert) key for some functionality. Since my MacBook doesn’t have an Insert key, we have to map another key to it:
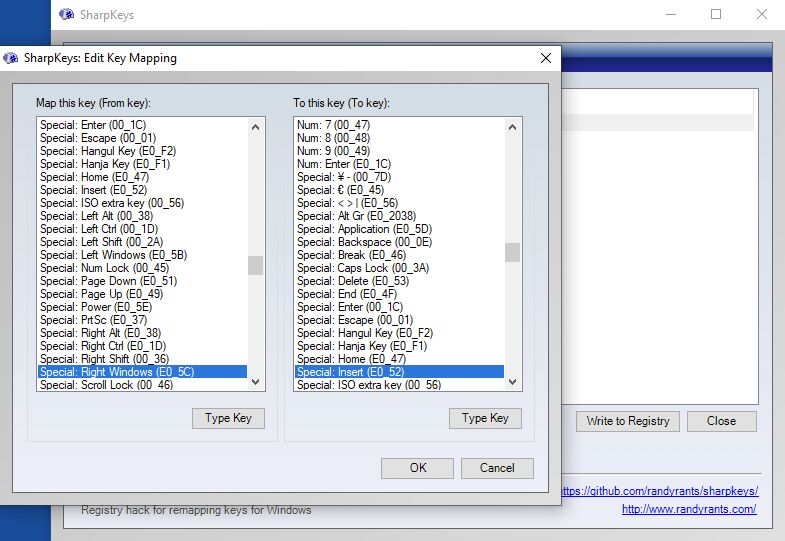
- Download and install SharpKeys. Once it loads, map the Insert key (left column) to another key (right column). I chose the right Cmd key, as this key is not used in Windows for any important actions. Click on the button ‘Write to Registry’. Restart the virtual machine, and your new key mapping should work.

- For NVDA, you should tick the option ‘Use Caps Lock as an NVDA modifier key’ in the start screen. This way you can use NVDA with your laptop keyboard.
Hight contrast mode
Next, we are going to set up high contrast mode.
- Click the Windows Start button, then select 'Settings' (the
 icon) → 'Ease of Acces' → 'High contrast'.
 - Choose the 'High Contrast Black' theme. Click on ‘Apply’.
As Firefox doesn’t completely take over the hyperlink colours like Internet Explorer in high contrast mode, we have to make those more visible.
- Open Firefox, and go to 'Options'.
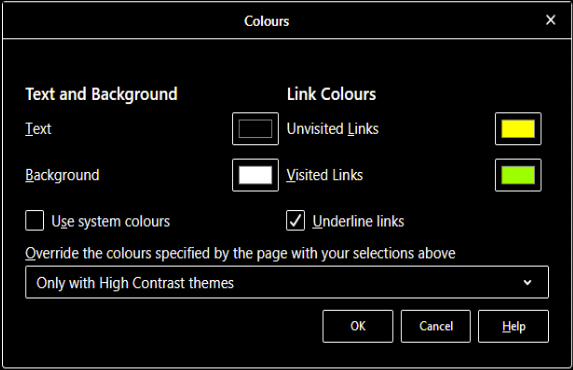
- Under 'Fonts and Colors', click ‘Colors…’.
- Pick yellow for 'Unvisited Links' and green for 'Visited links' to use the same colours as in IE.

VirtualBox snapshot
Finally, we want to make sure we can keep using this setup since Microsoft’s virtual machines can only be used for a maximum of 90 days.
- In the navigation bar of VirtualBox, click 'Machine' → 'Take Snapshot…'.
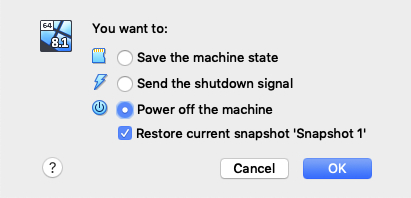
- Give your snapshot a name and click 'OK'. When powering off the machine, always make sure you select the checkbox ‘Restore current snapshot’.

How to use a screen reader
The manual for JAWS and manual for NVDA are available on their websites. WebAIM has nice quick start guides for both JAWS and NVDA. Additionally, Rob Dodson gives an excellent introduction to using NVDA in his A11ycasts series on YouTube. Happy testing!

